The second half of February brought some amazing weather to Whidbey, and we weren’t the only ones who took it as a sign to get out into the garden. We used the warm clear days to work on the garden beds, the hoophouse, and the rain garden. More on that:
Rain gardens are a great way to reduce the amount of water your house and property drop into a gutter or storm drain (not to mention the pollutants included in that water), and they can also help clear up muddy spots under your downspouts. For an in-depth description, take a look at this site: Pierce County Low Impact Development site.
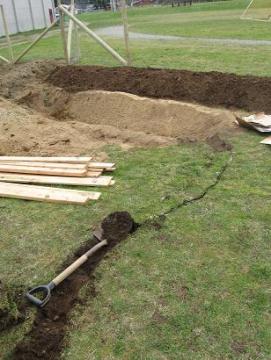
Our rain garden is fed by half of the water falling on our storage shed – the other half goes into a series of rain barrels for use in the garden (more on that soon!). Some pictures of the beginning of the process:


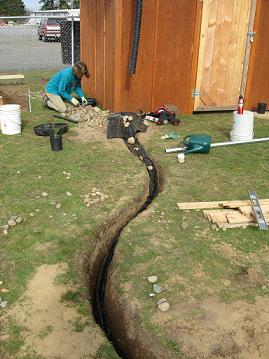
First step: trace the outline and dig out that sod. After the top layer was off, we dug it out ever deeper. The soil became sandier and sandier as we went down. I also started building a low mound around the depression to keep the water in (but i don’t think we’ll have problems with water overflow, considering how sandy the soil is). Speaking of water, here are some shots showing the process behind constructing the creek bed:
After we traced out the path for the creek, it came down to diggin’, and diggin’, and digging some more.
It ended up at 18 inches deep at the far end because of the slope of our site. If you’re putting it in on an existing downhill slope, you should be able to keep it shallower than this. This bottom picture of the finished trench shows the next step – after everything’s dug to the right depth, line the bottom with a double layer of weed cloth. We used a felted kind and it feels pretty much waterproof. Once the lining’s in we tested the flow with about a quart of water at a time. The creek bed did its job and got the water into the garden, so we finished it off a few days later by filling it up with small (1″ diameter or less) stones collected from the garden, plus a few buckets of gravel donated by
Landshapers, a local landscaping company. One last shot of the final product:
Next time we’ll look at the raingarden itself and get an update on our most recent work party.
Continue reading →


